Integrating Luma One with Home Assistant TLS
This guide explains how to securely connect Luma One (XL) modules to Home Assistant using MQTT Auto Discovery with TLS encryption. Once configured, Luma One devices automatically appear in Home Assistant.
Mosquitto MQTT broker TLS-PSK regression (important)
There is currently a regression in newer versions of Mosquitto MQTT regarding TLS-PSK connections.
- ✅ Confirmed working: Mosquitto 2.0.22 (Home Assistant add-on version 6.5.2)
- ❌ Not working: Mosquitto 2.1.2 (Home Assistant add-on version 7.1.0)
If you experience connection issues when using TLS-PSK (modules not connecting, no MQTT messages, or authentication failures), downgrade the Mosquitto add-on inside Home Assistant to version 6.5.2 or older.
This issue appears to be related to changes in TLS handling in newer Mosquitto MQTT releases.
Architecture Overview
flowchart LR
  LO([Luma One Module])
  MQTT[(MQTT Broker)]
  HA([Home Assistant])

  LO <-- MQTT --> MQTT
  MQTT <--> HA
Broker location
This tutorial assumes the MQTT broker (Mosquitto) runs as an add-on inside Home Assistant.
Prerequisites
- Luma One (XL) modules connected to the local network
- Home Assistant device running on the same network
Step 1 — Configure modules
a. Enable Home Assistant Support
- Connect to your module with LumaConfig
- Navigate to:
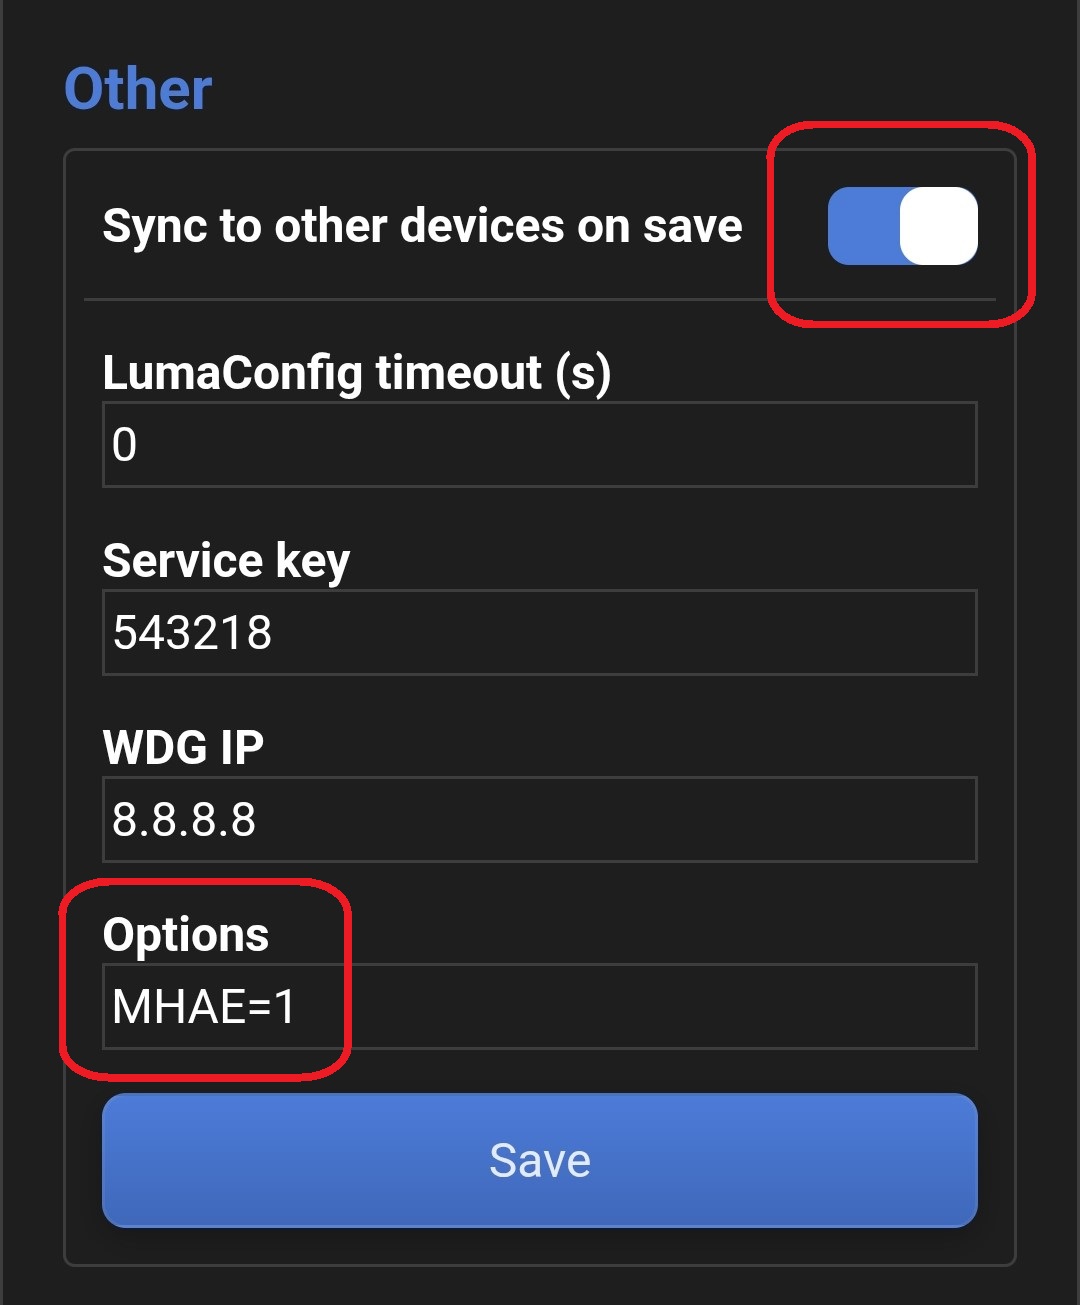
Dashboard Module → Configuration → Module Configuration → Other - Select
sync to other devices on saveto automatically enable Home Assistant support for all modules on the LumaLink bus (instead of the connected module only). - Add the following option (Module Home Assistant Enable):
MHEA=1 - Press
Save
b. Configure TLS encrypted MQTT connection
- Navigate to
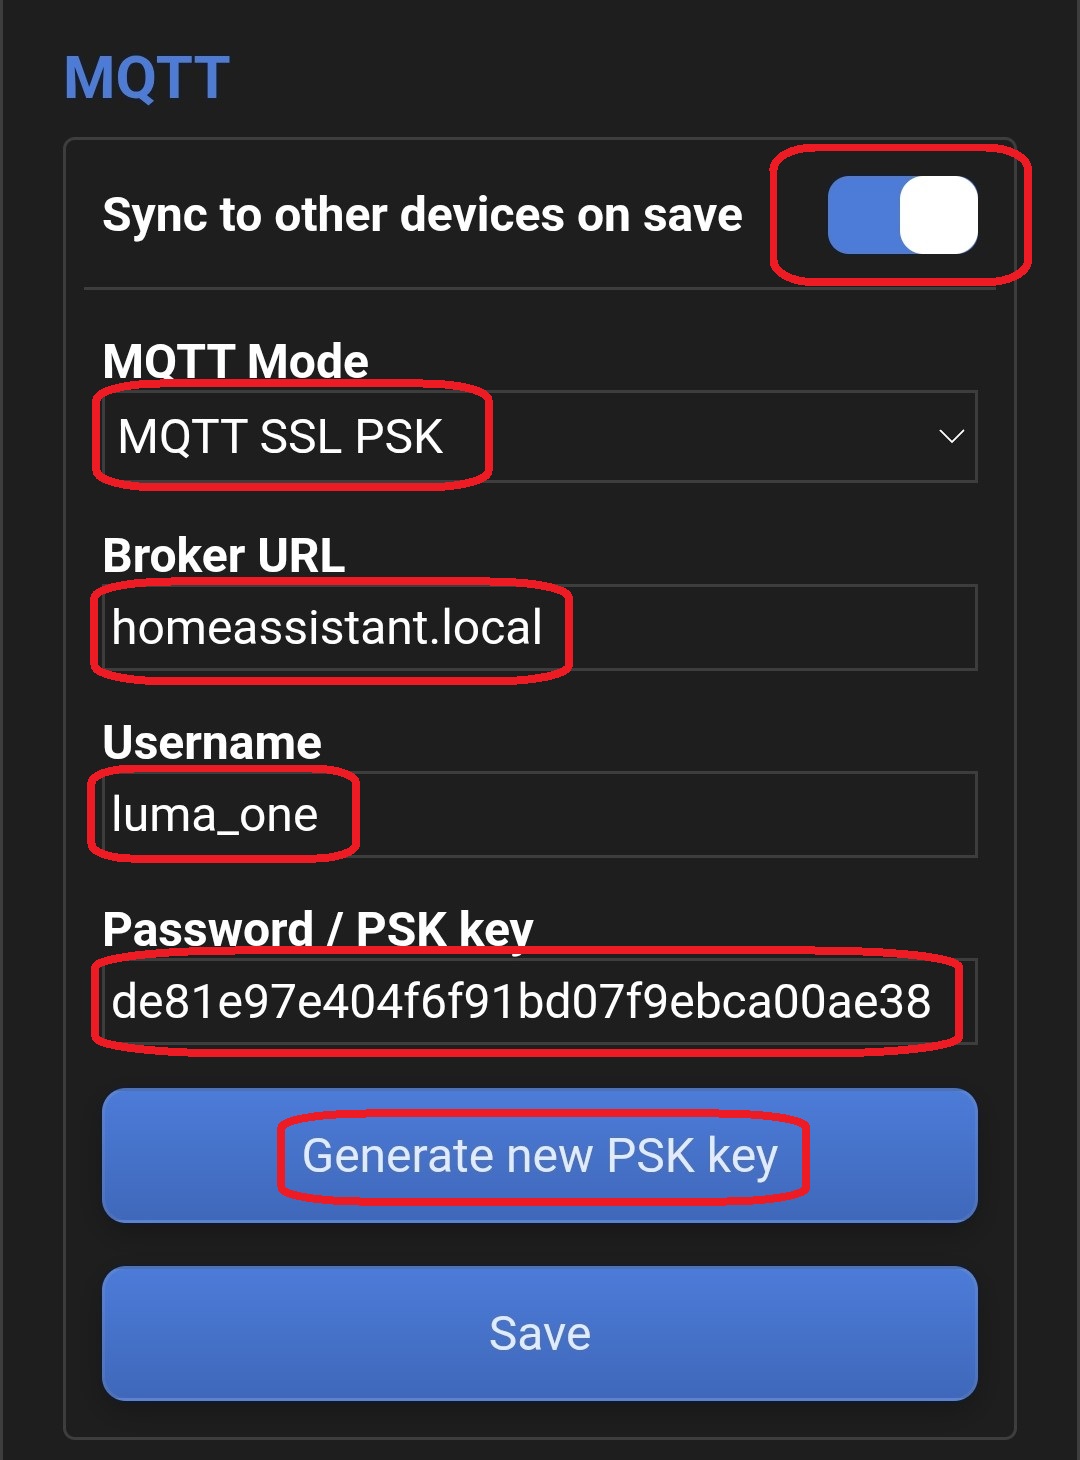
Dashboard Module → Configuration → Module Configuration → MQTT - Select
sync to other devices on saveto automatically set the same MQTT config for all modules on the LumaLink bus (instead of the connected module only). - Select
MQTT SSL PSKmode - Set MQTT broker URL, use
homeassistant.localor the IPv4 address of your Home Assistant device. - Choose a username (may be different from Home Assistant password).
- Generate a new PSK key for optimal security (Password field)
- Press
Saveand restart the module(s)
Tip
- Using
homeassistant.localas URL can cause problems in some cases (multiple Home Assistant devices, mDNS network issues etc.). So use a fixed IPv4 address for your Home Assistant device if you experience problems. - Copy/paste the PSK key and username temporarily, you need them later on in the
pskfilein Home Assistant. - Modbus TCP will be disabled automatically when using MQTT SSL PSK mode.
Step 2 — Configure Home Assistant
a. Install and configure Mosquitto broker add-on
- Navigate to
Home Assistant Dashboard → Settings → Add-ons → Add-on store → Mosquitto broker - Install add-on
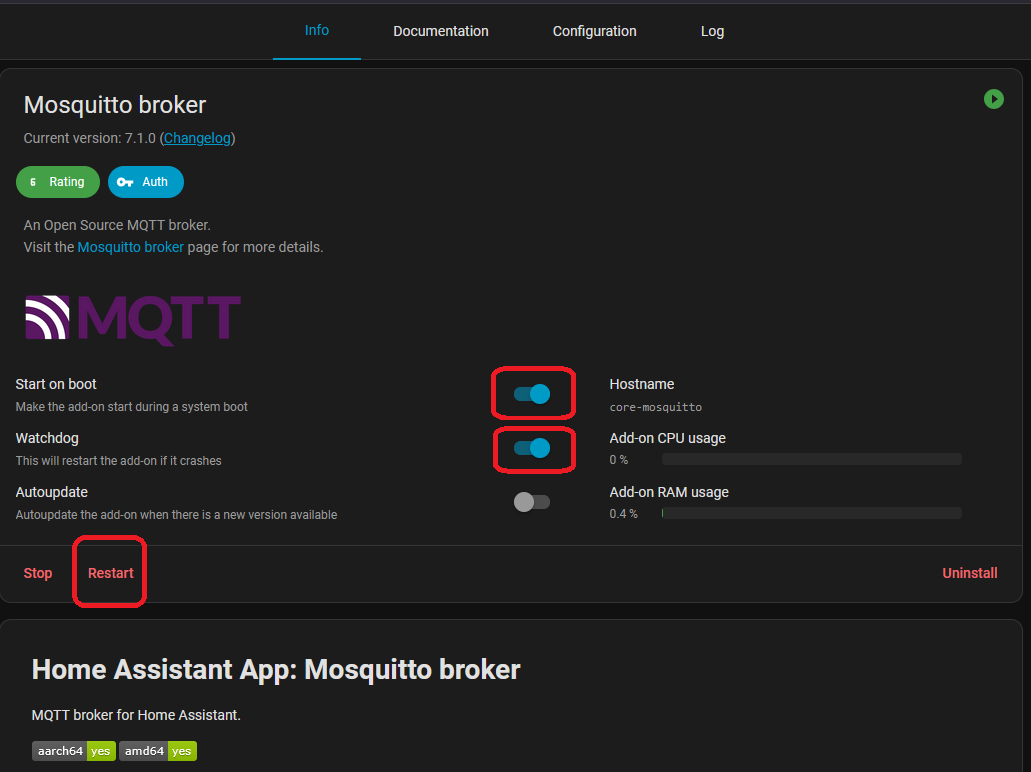
- Enable
Start on bootandWatchdogsettings
- In the
Configurationtab, activate theCustomizeoption with folder set tomosquitto.
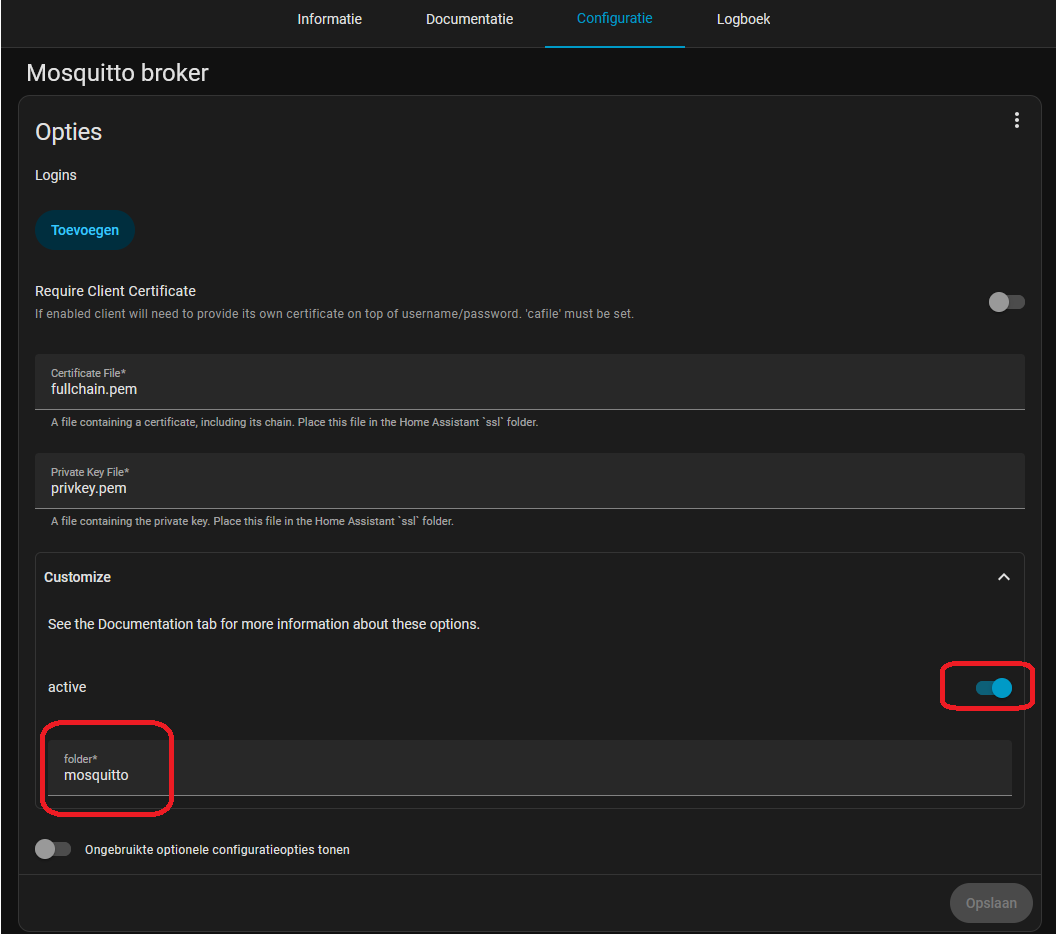
- Restart add-on afterwards
b. Customize Mosquitto broker for TLS-PSK encryption
- With the File editor add-on, create a new folder
mosquittoin/share - Create
psk.conffile in/share/mosquittowith the following content:listener 8883 psk_hint lumacontrols psk_file /share/mosquitto/pskfile allow_anonymous false use_identity_as_username true - Create a file named
pskfilein/share/mosquittowith your credentials on the first lineusername:psk-key(without spaces). This is the username/psk key you created in the previous step.
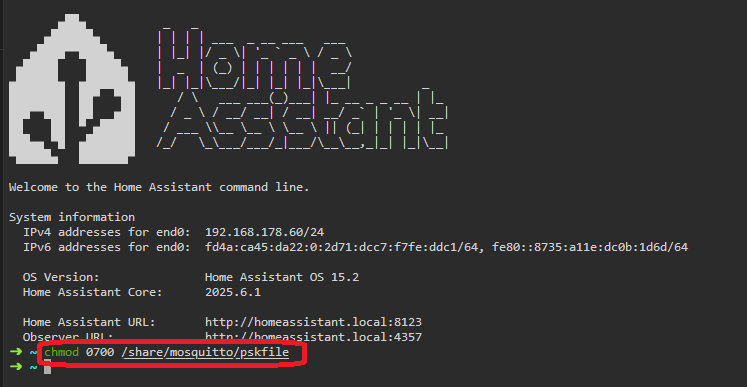
Example content:luma_one:de81e97e404f6f91bd07f9ebca00ae38 - Run this command in the Terminal add-on to secure the file
chmod 0700 /share/mosquitto/pskfile
- Restart device
Home Assistant Dashboard → Settings → System → Upper right corner → Advanced options → Reboot system, this can take several minutes!
Step 3 — Verify setup
- Navigate to
Home Assistant Dashboard → Settings → Devices & services → Services - If all went well, your Luma devices should now be present in this list. The device name suffix corresponds to the set LumaLink bus address.
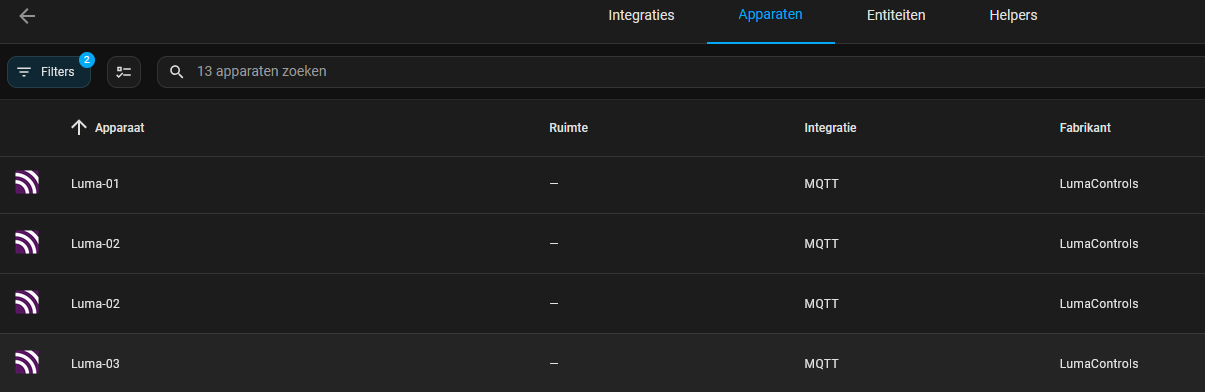
- Opening (clicking on) a device shows an overview of the automatically added entities for this device.
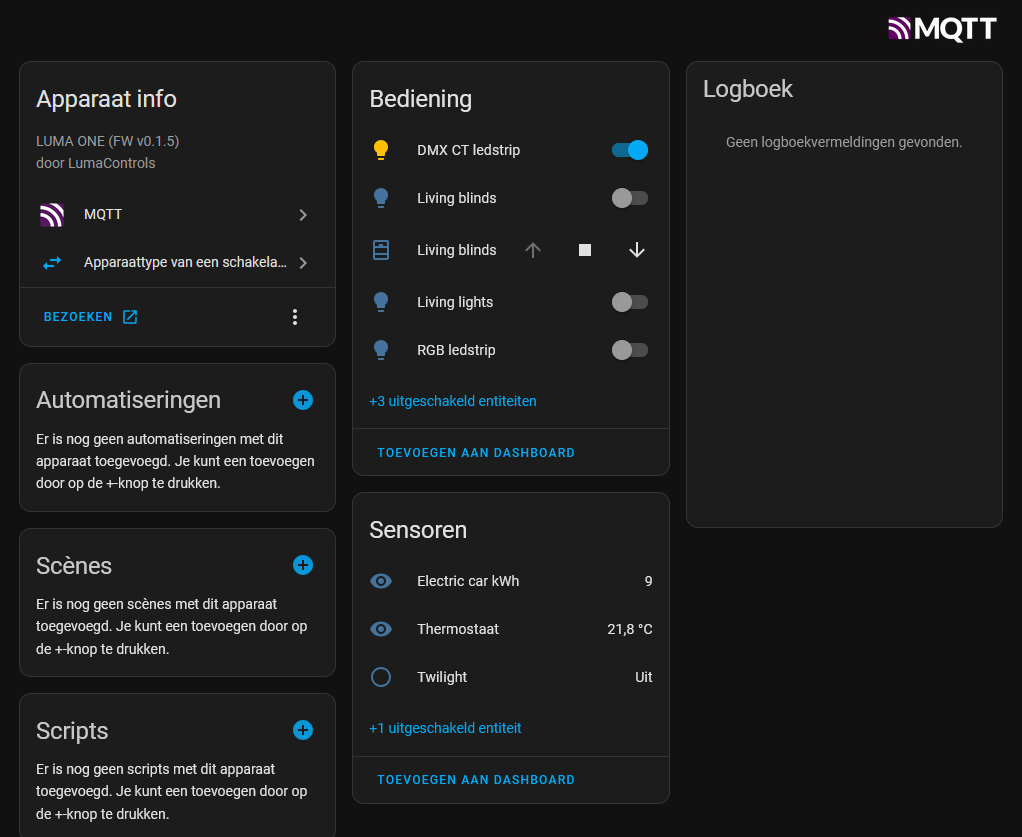
- Now you can manually control entities, add them to dashboards, integrate them in automations etc. Please refer to the Home Assistant documentation.
Troubleshooting
❌ Modules not appearing in Home Assistant devices list
- MQTT autodiscovery typically takes 1-2 minutes to be fully in sync
- Ensure
MHEA=1option is enabled for all modules - Restart Mosquitto broker add-on
- Restart Luma modules + Home Assistant device
- Verify all devices are on the same local network
- Ensure your MQTT credentials are correct
- Check MQTT connection state in modules with LumaConfig:
Dashboard Module → Information → MQTT → State - Check Mosquitto broker add-on logs:
Add-on → Logs - Check Home Assistant logs:
Settings → System → Logs - Use a fixed IPv4 address for Home Assistant instead of
homeassistant.local - Try the non-TLS version